 |
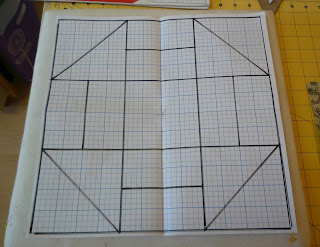
| Drafted block |
 |
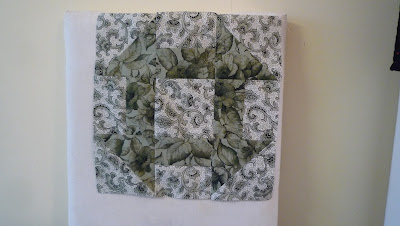
| Churn Dash or Double Monkey Wrench |
At the U3A the newish quilters are having a back to the beginning term, six sessions and two blocks a session. We are looking at the common shapes in block patchwork, the square, half square triangle, quarter square triangle, oblong and combinations such as the square in a square and flying geese. We are starting with templates but moving on to other techniques involving rotary cutting and also foundation piecing. However I think learning to draft and template making helps one to analyse patterns and become more independent as a quiltmaker. Also once having grasped the concept of templates and pattern making one can go on to use these techniques in very creative ways - many art quilters begin with a "cartoon" that is cut up into the individual shapes.
Anyway we begin by testing the accuracy of our 1/4" by sewing two 2" squares together (2x3.5'') and adding a 2x3.5'' strip to result in a 3.5" square.
We then went on to draft the block on 12'' graph paper dividing it into 4'' squares as Churn Dash is a 9-Patch block. There are three different shapes - square, half square triangle and oblong - and on a second piece of graph paper students drew each one using the original diagram as a guide. Each piece was cut round roughly and glued to card; we used cereal boxes. It's best to glue the paper shape onto the printed shiny side of the box so the rougher matte surface will cling to the fabric at the final stage. Each template was labelled with its shape, finished size and a minus sign to show the seam allowance hadn't been added. The little brass wheel is a wonderful gadget known as a Wonder Wheel or Quilters' Quarter wheel.
We used it to add seam allowances by sticking a pencil in the central hole and then moving it round the card to make unfinished size templates. In the picture the left hand which would normally be on the template to hold it steady is missing because it was holding the camera.
|
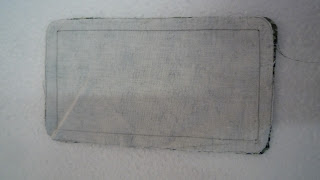
 You can use either template to draw the shape onto the reverse side of the fabric. Here I've used the finished size template to draw the sewing line, useful if hand piecing.
When we drafted the block we started with the major lines and filled them in; when sewing it's the opposite - we sew the square units then join them first into rows then the block.
STAGE ONE - set out shapes and sew units
Stage TWO - sew rows
Stage THREE - sew block
Here I've used three fabrics but in the first version I used two.
|


No comments:
Post a Comment